Introduction:
Welcome to the sweet world of stained glass cookies, where baking meets artistry! These delectable treats aren’t just a feast for the taste buds; they’re a visual delight that adds a touch of whimsy to any occasion. In this article, we’ll delve into the magical realm of stained glass cookies, exploring their history, the art of making them, and why they’re a must-have for any baking enthusiast.

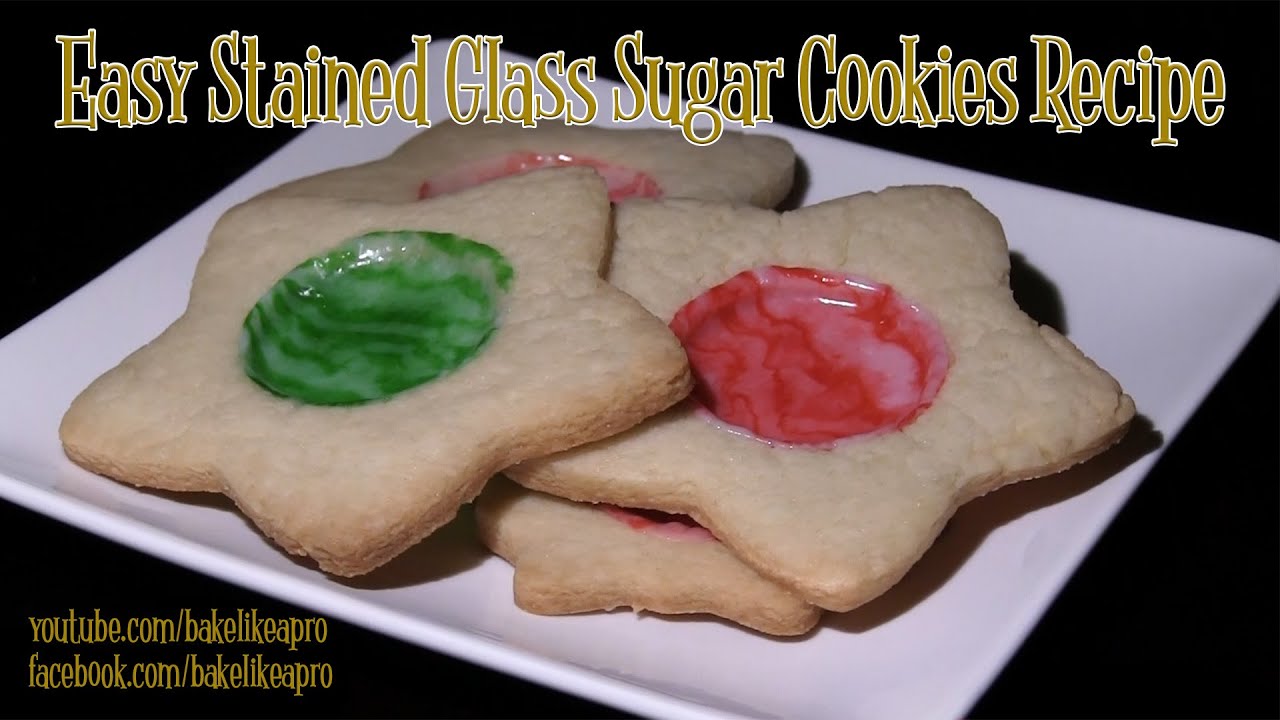
The Art of Stained Glass Cookies
Stained glass cookies are more than just your average baked goods; they’re miniature works of edible art. These delightful treats mimic the vibrant colors and intricate patterns of traditional stained glass windows, making them a feast for the eyes as well as the palate. The secret lies in the unique technique of using colorful hard candies to create the “glass” effect within the cookie dough.
A Brief History

The origins of stained glass cookies can be traced back to medieval Europe, where stained glass windows adorned churches and cathedrals. Bakers were inspired by the intricate designs and vibrant colors of these windows, leading to the creation of edible replicas in the form of cookies. Over the centuries, stained glass cookies have evolved into a beloved baking tradition, cherished for their beauty and delicious taste.
Ingredients You’ll Need
To create your own stunning stained glass cookies, you’ll need a few simple ingredients:

Cookie Dough: Prepare your favorite sugar cookie dough recipe or opt for pre-made dough for convenience.
Hard Candies: Choose a variety of colorful hard candies such as Jolly Ranchers or Life Savers. These will serve as the “stained glass” in your cookies.
Cookie Cutters: Select cookie cutters in your desired shapes and sizes to create the base for your stained glass designs.
Parchment Paper: This will prevent the melted candy from sticking to your baking sheet.
The Baking Process
Now that you’ve gathered your ingredients, it’s time to bring your stained glass cookies to life:
Prepare the Dough: Roll out your cookie dough on a floured surface and use cookie cutters to create your desired shapes.
Create the “Glass”: Place the cookies on a parchment-lined baking sheet and use a smaller cookie cutter to cut out the centers, creating space for the melted candy.
Add the Candy: Crush the hard candies using a food processor or a rolling pin, then sprinkle the crushed candy into the center of each cookie.
Bake to Perfection: Bake the cookies according to your recipe’s instructions, allowing the candy to melt and create the stained glass effect.
Cool and Enjoy: Once baked, allow the cookies to cool completely before gently removing them from the baking sheet. Admire your handiwork, then indulge in the deliciousness of your stained glass creations!
Tips for Success
Creating stained glass cookies is a fun and rewarding experience, but it requires a bit of finesse. Here are some tips to ensure your cookies turn out perfectly every time:
Choose the Right Candies: Opt for hard candies that melt evenly and produce vibrant colors. Avoid using candies with a chewy center, as they won’t create the desired effect.
Handle with Care: Be gentle when handling the cookies, especially after adding the crushed candy. Excessive movement can cause the candy to shift and distort the design.
Experiment with Designs: Don’t be afraid to get creative with your stained glass designs. Mix and match colors, or try different shapes and patterns to create unique variations.
Cool Completely: Allow the cookies to cool completely before removing them from the baking sheet. This will prevent them from breaking or sticking.
Store Properly: To preserve the beauty of your stained glass cookies, store them in an airtight container at room temperature. They should stay fresh for several days, although they’re likely to be devoured much sooner!
Conclusion: Stained glass cookies are a delightful combination of art and flavor, sure to impress both the eyes and the taste buds. Whether you’re a seasoned baker or a novice in the kitchen, these whimsical treats are a fun and delicious addition to any occasion. So why not unleash your creativity and whip up a batch of stained glass cookies today?
FAQs:
- Can I use any type of cookie dough for stained glass cookies? Absolutely! You can use your favorite sugar cookie recipe or even try a chocolate or gingerbread dough for a unique twist.
- Do I need to crush the candies into a fine powder? It’s best to crush the candies into small pieces rather than a fine powder. This will allow them to melt evenly and create the stained glass effect.
- Can I use gel food coloring instead of hard candies for the “glass”? While gel food coloring can add color to your cookies, it won’t create the same translucent effect as hard candies. For the authentic stained glass look, stick with candies.
- How far in advance can I make stained glass cookies? Stained glass cookies are best enjoyed within a few days of baking. However, you can prepare the dough and crush the candies ahead of time and store them separately until you’re ready to bake.
- Can I freeze stained glass cookies? While it’s possible to freeze stained glass cookies, the melted candy may become sticky when thawed. It’s best to enjoy them fresh for the best taste and texture.