Introduction:
If you’ve ever dreamed of a dessert that encapsulates the warmth of a cozy evening by the fireplace, the sweetness of childhood memories, and the comforting aroma of cinnamon swirling through your kitchen, then snickerdoodle blondies are about to become your new obsession. These delectable treats are the perfect fusion of two beloved classics: the chewy goodness of blondies and the irresistible allure of snickerdoodle cookies. So, let’s embark on a journey through the delightful world of snickerdoodle blondies, exploring their origins, how to make them from scratch, and why they’ve captured the hearts of dessert enthusiasts worldwide.
Unveiling the Origins

Like many culinary marvels, the exact origins of snickerdoodle blondies are shrouded in mystery and folklore. Some believe they were born out of a serendipitous kitchen experiment, while others attribute their creation to a brilliant baker seeking to combine the best of both worlds. Regardless of their genesis, one thing is certain: snickerdoodle blondies have earned their place in the pantheon of irresistible desserts.
The Essence of Snickerdoodle Blondies
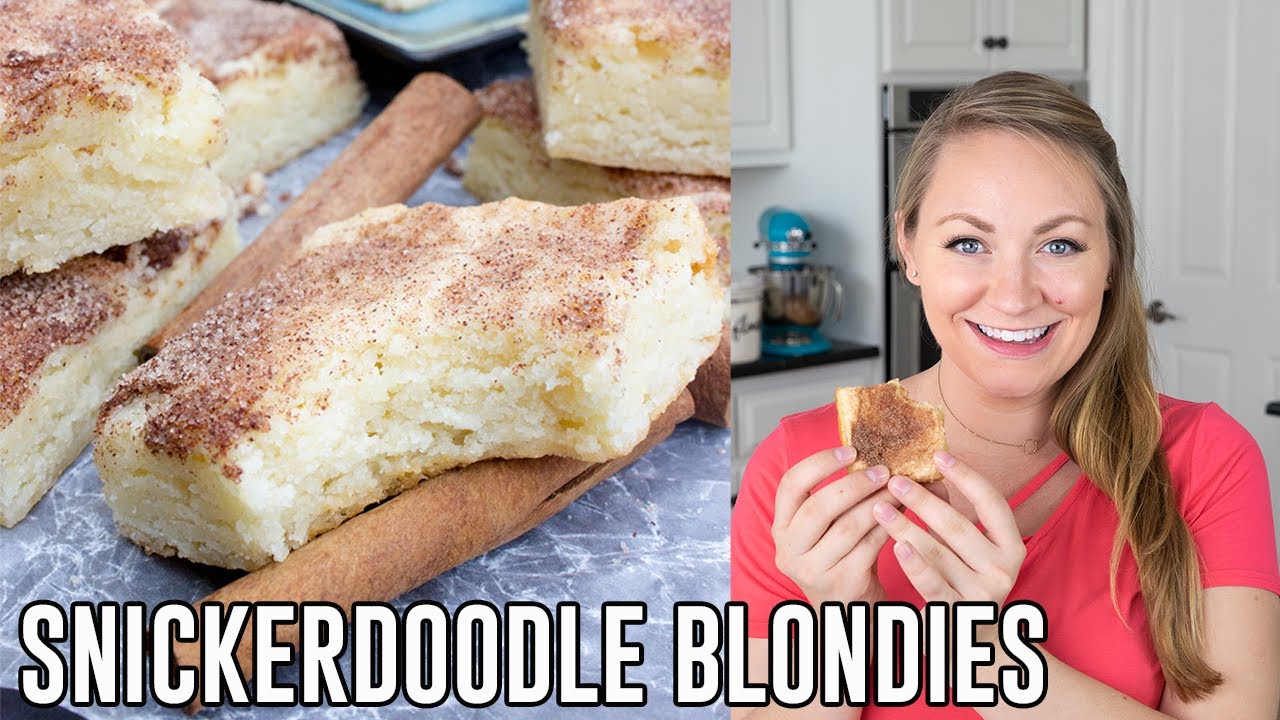
At their core, snickerdoodle blondies embody everything we love about traditional blondies—buttery, chewy, and packed with flavor—infused with the distinct charm of snickerdoodle cookies. Picture a golden brown square, speckled with cinnamon sugar and boasting a soft, melt-in-your-mouth texture that’s equal parts indulgent and comforting. With each bite, you’re greeted by a symphony of flavors: the subtle sweetness of vanilla, the warmth of cinnamon, and the rich butteriness that defines a perfect blondie.
Crafting Culinary Magic: How to Make Snickerdoodle Blondies
Now, let’s dive into the delightful process of creating your own batch of snickerdoodle blondies. Here’s a simple yet foolproof recipe that will have you savoring every blissful bite:
Ingredients:
- 1 cup (2 sticks) unsalted butter, melted
- 1 cup brown sugar, packed
- 1/2 cup granulated sugar
- 2 large eggs
- 1 tablespoon vanilla extract
- 2 1/2 cups all-purpose flour
- 1 teaspoon baking powder
- 1/2 teaspoon salt
- 1 tablespoon ground cinnamon
- 2 tablespoons granulated sugar (for cinnamon sugar topping)
Instructions:
Preheat your oven to 350°F (175°C). Grease a 9×13-inch baking pan and set aside.
In a large mixing bowl, combine the melted butter, brown sugar, and granulated sugar. Mix until smooth and creamy.
Add the eggs, one at a time, mixing well after each addition. Stir in the vanilla extract.

In a separate bowl, whisk together the flour, baking powder, salt, and ground cinnamon.
Gradually add the dry ingredients to the wet ingredients, mixing until just combined. Be careful not to overmix.
Spread the batter evenly into the prepared baking pan.
In a small bowl, mix together the remaining granulated sugar and cinnamon for the topping. Sprinkle the cinnamon sugar mixture evenly over the batter.
Bake for 25-30 minutes, or until the edges are golden brown and a toothpick inserted into the center comes out clean.
Allow the blondies to cool in the pan for at least 15 minutes before slicing and serving.
The Irresistible Allure
What makes snickerdoodle blondies truly irresistible? Perhaps it’s the perfect balance of sweetness and spice, or the nostalgic appeal of a beloved childhood treat. Whatever the reason, these delightful squares have a way of bringing joy to any occasion, whether it’s a cozy night in with loved ones or a festive gathering with friends. One bite is all it takes to be transported to a world of pure bliss, where every worry fades away and all that matters is the simple pleasure of indulging in something delicious.
Elevate Your Experience: Serving Suggestions
While snickerdoodle blondies are undeniably delightful on their own, why not take your indulgence to the next level with a few creative serving suggestions? Pair them with a scoop of creamy vanilla ice cream for a decadent dessert experience, or crumble them over Greek yogurt for a guilt-free treat. You can even sandwich a scoop of your favorite ice cream between two blondie squares for the ultimate ice cream sandwich!
In Conclusion
In the realm of irresistible desserts, snickerdoodle blondies reign supreme. With their buttery richness, enchanting aroma, and irresistible charm, these delightful treats have captured the hearts—and taste buds—of dessert enthusiasts around the world. Whether you’re a seasoned baker or a novice in the kitchen, making your own batch of snickerdoodle blondies is sure to bring a smile to your face and warmth to your soul. So, go ahead, indulge in bliss, and savor every blissful bite of these delectable squares.
Frequently Asked Questions (FAQs)
1. Can I use salted butter instead of unsalted butter?
Yes, you can use salted butter in this recipe, but you may want to reduce the amount of added salt to compensate for the saltiness of the butter.
2. Can I substitute whole wheat flour for all-purpose flour?
While you can substitute whole wheat flour for all-purpose flour, keep in mind that it may result in a denser texture and slightly nuttier flavor.
3. How should I store leftover snickerdoodle blondies?
Store leftover blondies in an airtight container at room temperature for up to 3-4 days for optimal freshness. You can also freeze them for longer storage—simply wrap individual blondies tightly in plastic wrap and store them in a freezer-safe bag or container for up to 2-3 months.
4. Can I add nuts or chocolate chips to the batter?
Absolutely! Feel free to customize your snickerdoodle blondies by adding chopped nuts, chocolate chips, or even dried fruit to the batter for an extra layer of flavor and texture.
5. Can I double the recipe to make a larger batch?
Yes, you can easily double or even triple the recipe to make a larger batch of snickerdoodle blondies. Just be sure to adjust the baking time accordingly and use a larger baking pan or multiple pans to accommodate the increased volume of batter.