Introduction:
Welcome to the world of indulgence! If you’re a cheesecake aficionado or just someone with a sweet tooth, you’re in for a treat. Today, we’re diving into the realm of Basque cheesecake—a delectable dessert that hails from the Basque region of Spain. Get ready to tantalize your taste buds and impress your friends and family with this easy-to-follow recipe.

The Origin Story of Basque Cheesecake
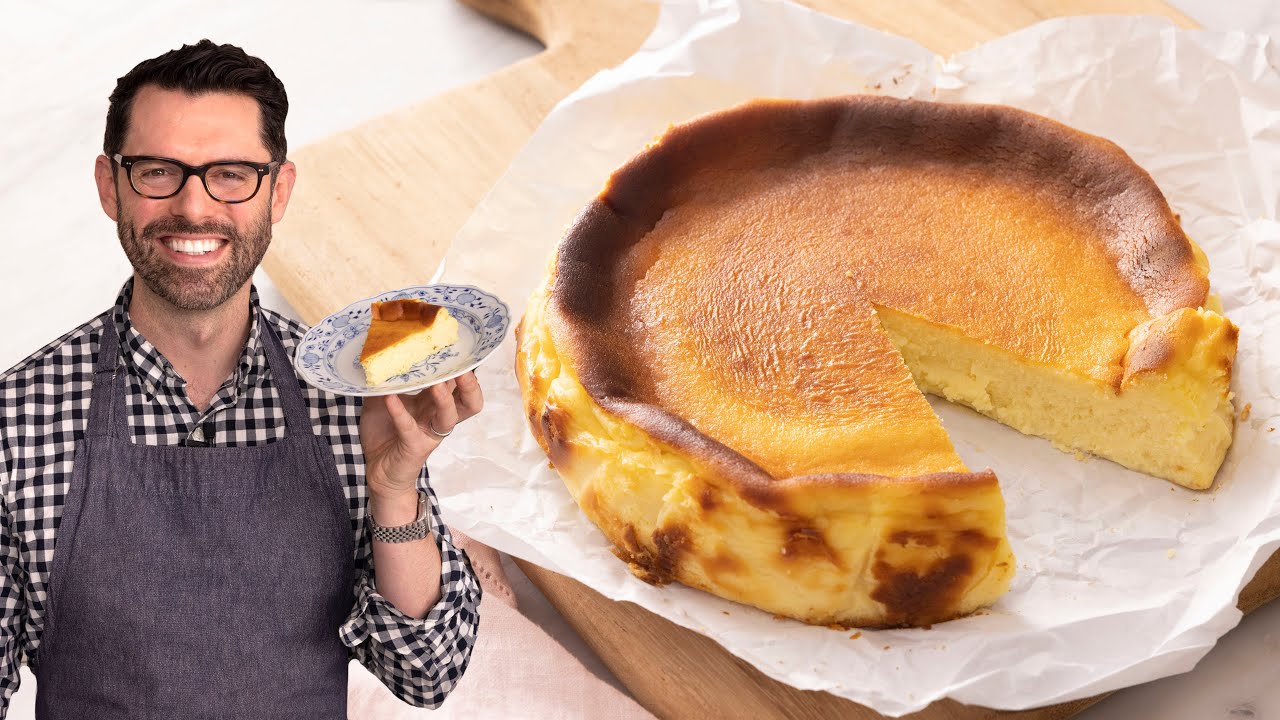
Let’s start with a little history lesson. Basque cheesecake, also known as “burnt cheesecake” or “tarta de queso,” originated in the Basque Country, nestled between Spain and France. Unlike its traditional New York counterpart, this cheesecake boasts a rustic, caramelized exterior and a creamy, custard-like interior.
What Sets Basque Cheesecake Apart?

What makes Basque cheesecake stand out from the crowd? It’s all about the unconventional baking method. Instead of meticulously preparing a graham cracker crust and carefully monitoring the oven, this recipe embraces imperfection. The high baking temperature creates a beautifully burnt top while leaving the center gloriously gooey—a delightful contrast of textures and flavors in every bite.
Gathering Your Supplies Before we dive into the culinary adventure, let’s ensure we have all the necessary ingredients and equipment on hand. You’ll need:
Ingredients:
- Cream Cheese: 500g (at room temperature)
- Granulated Sugar: 200g
- Eggs: 4 (at room temperature)
- Heavy Cream: 200ml
- All-Purpose Flour: 30g
- Vanilla Extract: 1 teaspoon
- Salt: A pinch
- Butter (for greasing the pan)
- Optional: Lemon Zest or Citrus Extract for added zestiness

Equipment:
- Springform Pan (8-9 inches)
- Parchment Paper
- Mixing Bowls
- Hand Mixer or Stand Mixer
- Spatula
- Aluminum Foil (for wrapping the pan)
Crafting Your Culinary Masterpiece
Preparing the Pan First things first, let’s prepare our baking vessel. Grease the bottom and sides of your springform pan with butter, then line it with parchment paper. This step ensures easy removal and prevents any potential sticking.
Mixing the Ingredients In a large mixing bowl, combine the cream cheese and granulated sugar. Using a hand mixer or stand mixer, beat the mixture until smooth and creamy. Add the eggs one at a time, mixing well after each addition. Gradually pour in the heavy cream while continuing to mix. Finally, add the vanilla extract, a pinch of salt, and any optional flavorings, such as lemon zest, for an extra burst of flavor.
Incorporating the Flour Slowly sift in the all-purpose flour, ensuring it’s evenly distributed throughout the batter. Be careful not to overmix at this stage—gentle folding motions will suffice. The flour acts as a stabilizer, giving the cheesecake structure without compromising its velvety texture.
Baking to Perfection
The Art of Imperfection Now comes the fun part—baking your Basque cheesecake to golden perfection. Preheat your oven to 425°F (220°C) and position the rack in the center. Pour the batter into the prepared springform pan, smoothing out the top with a spatula.
Embracing the Burn Place the pan in the oven and bake for approximately 50-60 minutes, or until the top is deeply caramelized with a jiggly center. Don’t be alarmed by the cracks and charred edges—these imperfections are what give Basque cheesecake its character and charm.
The Cooling Ritual Once baked, remove the cheesecake from the oven and let it cool to room temperature. Resist the urge to slice into it immediately—patience is key here. As it cools, the cheesecake will set further, achieving the perfect balance of creamy goodness and caramelized crust.
Serving Up Sweet Satisfaction
Slicing and Serving After patiently waiting (trust us, it’s worth it), it’s time to slice into your Basque cheesecake. Run a knife around the edge of the pan to loosen the cake, then release the springform sides. Cut generous slices and marvel at the creamy interior and caramelized exterior.
Optional Garnishes Feel free to get creative with your presentation. Dust the cheesecake with powdered sugar, drizzle with caramel sauce, or serve alongside fresh berries for a pop of color and tartness. However you choose to garnish, rest assured that each bite will be a symphony of flavors.
Conclusion:
Congratulations, you’ve successfully embarked on a culinary journey to create the perfect Basque cheesecake. With its rich, creamy texture and caramelized crust, this dessert is sure to delight your taste buds and impress your guests. Embrace the imperfections, savor each bite, and enjoy the sweet satisfaction of homemade goodness.
FAQs:
1. Can I use low-fat cream cheese for this recipe? While you can technically use low-fat cream cheese, keep in mind that it may affect the texture and richness of the cheesecake. For best results, stick to full-fat cream cheese for that indulgent experience.
2. Can I make this cheesecake ahead of time? Absolutely! Basque cheesecake actually tastes better when chilled overnight. Prepare it the day before serving to allow the flavors to meld and the texture to set beautifully.
3. Can I freeze leftover cheesecake slices? Yes, you can freeze leftover cheesecake slices for up to one month. Simply wrap them tightly in plastic wrap or aluminum foil and store them in an airtight container. Thaw in the refrigerator before serving.
4. Can I substitute the heavy cream with something else? For a lighter alternative, you can use half-and-half or whole milk, but keep in mind that it may alter the richness of the cheesecake. Coconut cream can also be used for a dairy-free option.
5. My cheesecake cracked. Did I do something wrong? Not to worry—cracking is a common occurrence with Basque cheesecake due to its high baking temperature and custard-like texture. Embrace the cracks as part of the charm, or simply cover them up with powdered sugar or whipped cream before serving.